External Network Access to Kestrel and IIS Express in ASP.NET Core
Today I ported over my AlbumViewer sample Angular 2.0 application I worked on for a workshop for the last few weeks, to my ASP.NET Core project. I’ve been building various different kinds of backends for this Angular 2.0 front end app and it’s been very easy to simply swap them out by changing the base URL to the API endpoints.
I’ve been working on the Angular 2.0 app on my Mac, but the server side ASP.NET I’m moving it to is running on Windows using ASP.NET Core and so I need to run my API application in a Windows VM on Parallels and access this API from the Mac side where the Angular application is running locally using the WebPack dev server.
In order to access the Windows API service from the Mac requires a bit of configuration as by default both Kestrel and IIS Express only serve requests on localhost. Both servers use default bindings that point explicitly at localhost which effectively disables remote access.
In order to make this work there are a couple of configuration steps required:
- Change the default URL binding to a non-localhost address
- Open the Firewall port
- Map a host name to make it easier
Kestrel: What’s the Problem? Url Bindings
The issue is that the default binding that Kestrel uses, binds explicitly to localhost. A localhost bound IP won’t expose to the external network, so even though you might be able to access other ports on the VM over the network – like IIS running on port 80 – accessing of http://<WindowsVmIp>:5000/ is not supported without some configuration changes.
When Kestrel starts without any binding customization you get:
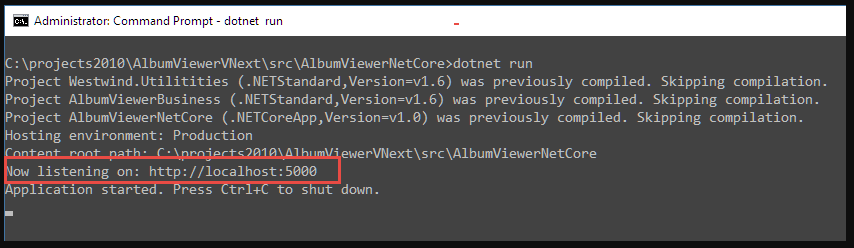
which clearly shows that it’s using the localhost URL.
Override the default URLs
In order to expose Kestrel externally you either have to bind to a specific machine name, IP Address or 0.0.0.0 which stands for all IP Addresses (thanks to @DamianEdwards and @BradyMHolt for their help).
ASP.NET Core allows overriding the startup URLs as part of the startup process for the Web host and there are a number of ways that you can do this:
- Set the –urls command line parameter
- Use WebHost.UseUrls()
- Set up hosting.json
You can override the start this via the launch command line:
 dockerfile
 dotnet run --urls http://0.0.0.0:5001
In order for this to work make sure that command line argument configuration is enabled as part of the startup procedure:
 csharppublic static void Main(string[] args)
 {
     // use this to allow command line parameters in the config
     var configuration = new ConfigurationBuilder()
         .AddCommandLine(args)
         .Build();
     ...
 }
If you want more control you can also explicitly set the host Url or Urls. In code you can use the following – including reading a configuration setting from a custom command line parameter:
csharppublic static void Main(string[] args)
{
// use this to allow command line parameters in the config
var configuration = new ConfigurationBuilder()
.AddCommandLine(args)
.Build();
var hostUrl = configuration["hosturl"];
if (string.IsNullOrEmpty(hostUrl))
hostUrl = "http://0.0.0.0:6000";
var host = new WebHostBuilder()
.UseKestrel()
.UseUrls(hostUrl) // <!-- this
.UseContentRoot(Directory.GetCurrentDirectory())
.UseIISIntegration()
.UseStartup<Startup>()
.UseConfiguration(configuration)
.Build();
host.Run();
}
With that in place you could run:
 dockerfiledotnet run                                 // default on port 6000
 dotnet run --hosturl http://0.0.0.0:6001   // explicit
The key is the .UseUrls() call that applies the host url to the Webhost and as you can see you can apply logic and configuration to decide where the value comes from.
Note that you can specify multiple startup URLs separated by semicolons in the string passed.
Open your Firewall
Next you need to make sure that your Windows firewall allows access to the requested port.
 pgsql
 netsh advfirewall firewall add rule name="Http Port 5000" dir=in action=allow protocol=TCP localport=5000
or you can use the interactive Windows Firewall application.
Assuming you used a non-localhost IP address or name, your application should now be externally accessible when you dotnet run.
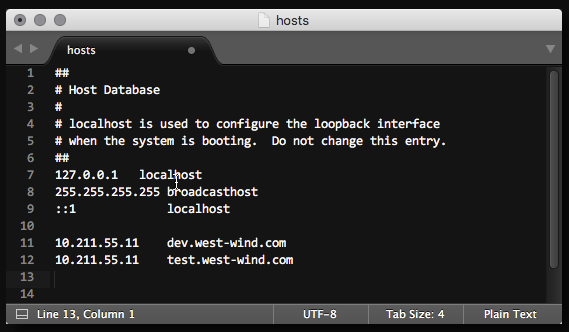
On the Mac: Create a HOSTS entry
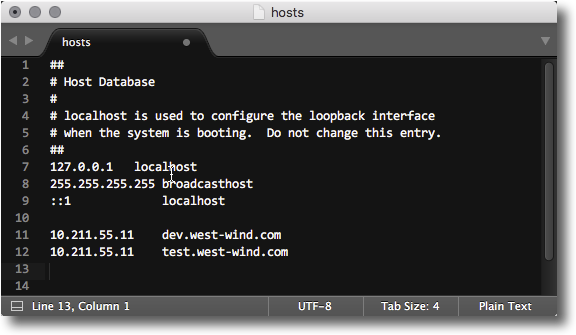
This step is optional, but when developing in a two OS environment I like to make it as easy as possible to identify machines, so I tend to create domain names for the server rather than using an IP address to access it by modifying the HOSTS file on the client machine. So I have dev.west-wind.com locally which maps to the IP address of my Windows virtual machine in Parallels.
With this in place I can now navigate to my app with:
http://dev.west-wind.com:5000/index.html
to get to my ASP.NET Core application on the Windows VM. Schweet!
Exposing IIS Express to the Network
If you want to use IIS Express and allow external access, you need to explicitly change the bindings in the solution applicationhost.config file which can be found in <solutionRoot>\.vs\config. Change the bindingInformation to:
 xml<site name="AlbumViewerNetCore" id="2">
     <application path="/" applicationPool="Clr4IntegratedAppPool">
       <virtualDirectory path="/" physicalPath="C:\projects2010\AlbumViewerVNext\src\AlbumViewerNetCore" />
     </application>
     <bindings>
       <binding protocol="http" bindingInformation="*:26448:*" />
       <binding protocol="https" bindingInformation="*:44319:*" />
     </bindings>
 </site>
changing the *:26448:localhost to *:26448:* where 26448 is the IIS Express port.
Then run:
 nginx
 netsh http add urlacl url=http://*:26448/ user=Interactive listen=yes
to bind the http.sys entry.
Finally open the firewall to allow inbound connections to the specific IIS Express port:
 pgsql
 netsh advfirewall firewall add rule name="Http Port 26448" dir=in action=allow protocol=TCP localport=26448
and you should be off to the races.